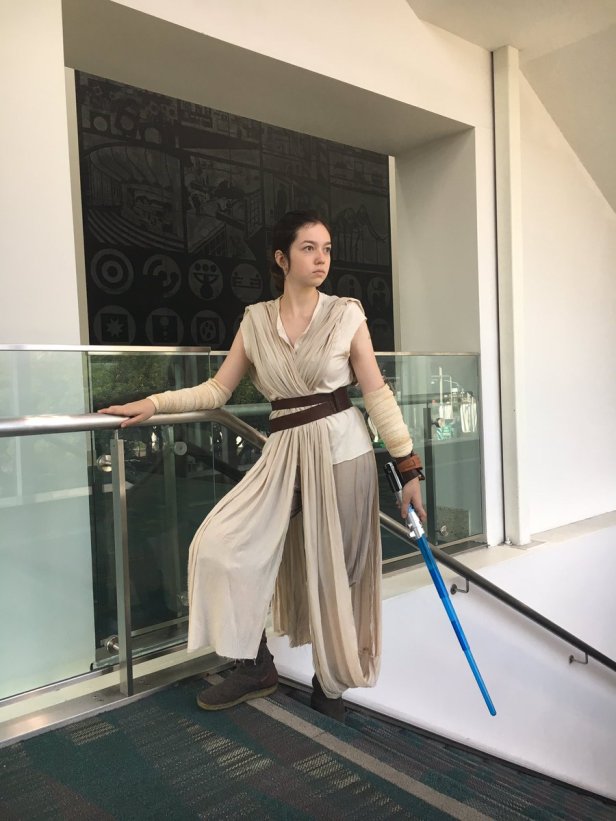
For my very first post on this brand new site, I’m going to post a short tutorial on how to cosplay as Rey in her Scavenger gear. As a note, I’m not Rebel Legion approved (yet!) but that’s my goal; every tweak I make to the costume is with that in mind. This is also the first cosplay I have ever made, which means I’m slightly nervous about talking about it publicly. The first time I wore it out to a convention, I had butterflies the entire Lyft ride there. What would people think of my outfit? Was I just a big faker who couldn’t keep up with those really talented cosplayers? Should I have just worn real people clothes and not put myself out there?
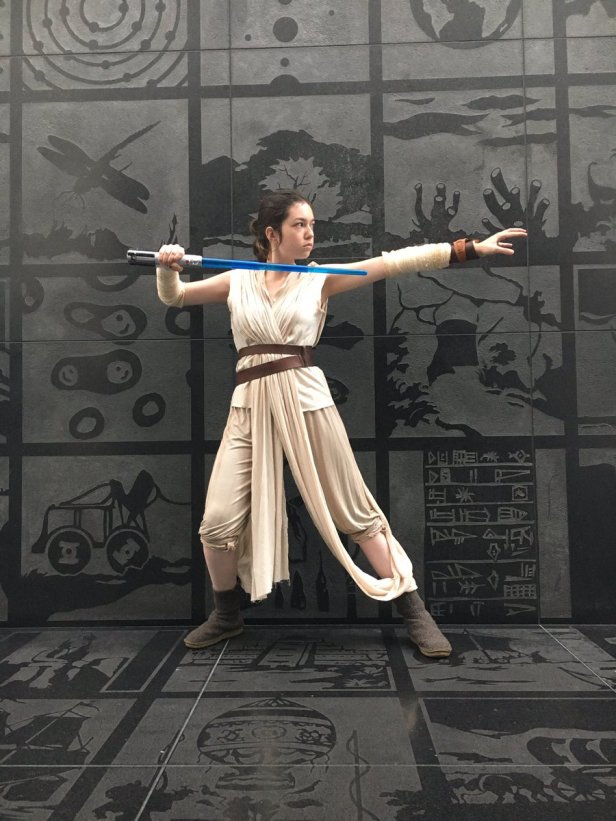
Then I realized that cosplaying isn’t what others think of you, it’s what you think of yourself. And I felt like a total bada** in my Rey getup. I spent the entire day thrilled, and so proud of how my outfit turned out. And now, I want to share how I made it with other junior cosplayers who are still figuring out how to dive into the hobby. This costume is actually quite easy to make with minimal sewing skills. The real challenges come with dyeing the items you’re modifying, and just having the courage to start!
First off, let’s talk the parts I commissioned. I got my fabulous bracer from Kristen, a fellow member of the Rey Cosplay Community on Facebook. If you’re not a member of that group, I highly recommend joining; it’s such a welcoming, wonderful place whether you’re the most experienced cosplayer at the con or just the new kid on the block. Kristen made my bracer and sent it out within a couple of days, insuring I had it for the convention I attended. I cannot thank her enough for it. My belt was from a previously commissioned Rey costume (Resistance) from PeeledBananasToGo on Etsy. Margarita is a phenomenal seamstress and I adore my belt.
My boots are the original Po-Zu piper v dark brown boots that were worn by Daisy Ridley in The Force Awakens. I purchased my boots before they began making their Rey boots as part of the Star Wars collection they sell. While the boots are incredibly price-y, I cannot recommend them enough. I wear them nearly every day to my job where I’m on my feet for about eight and a half hours, and it’s so comfortable I might as well be wearing slippers. I would absolutely recommend any Po-Zu shoes to an aspiring Rey. They go well with regular outfits, make your cosplay a little more screen accurate, and are just an awesome purchase overall.
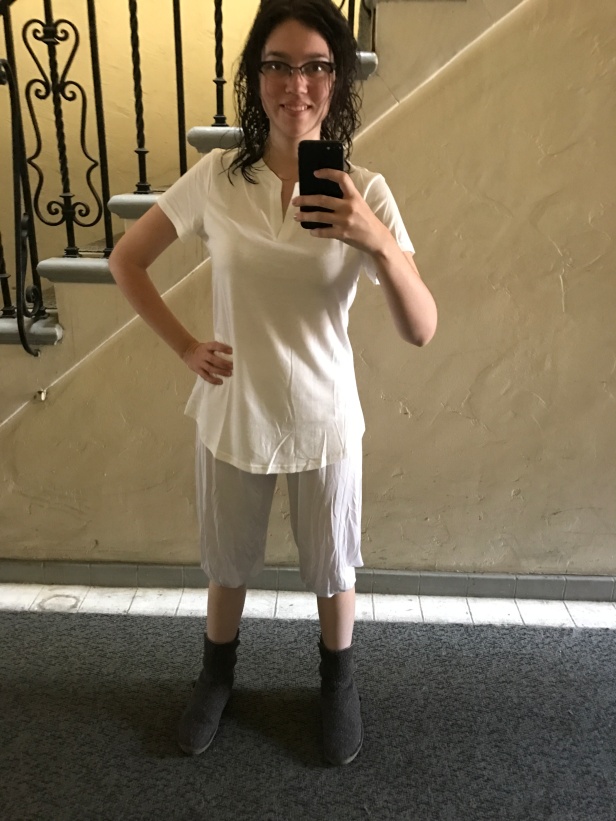
Now, onto the actual making of the costume. Since I wasn’t ready to start handsewing pants or a shirt, I wound up purchasing this shirt and these pants to modify, based on recommendations from Reys in the cosplay community. I wound up getting the pants in white, since I wasn’t sure if the grey would be RL approvable. Please enjoy this awkward photo of me modeling the clothes before I dyed them.
I also bought cotton bandages from Walgreens for Rey’s arm wraps. These have been the most problematic element of my costume, as they don’t like to stay up. My two options have become either upgrading to new bandages from Amazon or sewing these bad boys onto a compression sleeve for easy on and off. If you go for the compression sleeve option, these bandages work very well and look quite similar to what Daisy wears in the actual film (which are Boots brand bandages and are not sold in the US).
My first step was to tea dye the bandages and shirt, as well as actually dye the pants. For the tea dyeing, I used about twenty bags of Lipton tea. For the pants, I used equal measure (about a teaspoon or so) of Dharma Safari Grey and Ecru. For newbie dyers, you only need about one 2 oz thing of dye to work; I overbought and now have wayyyyyy too much dye and nothing to use it on (well, until I decide to update my Rey outfit at least). I left the pants in for about twenty minutes, then rinsed them out. Below, I’ve included a photo of what the shirt, bandages, and pants looked like the next day.
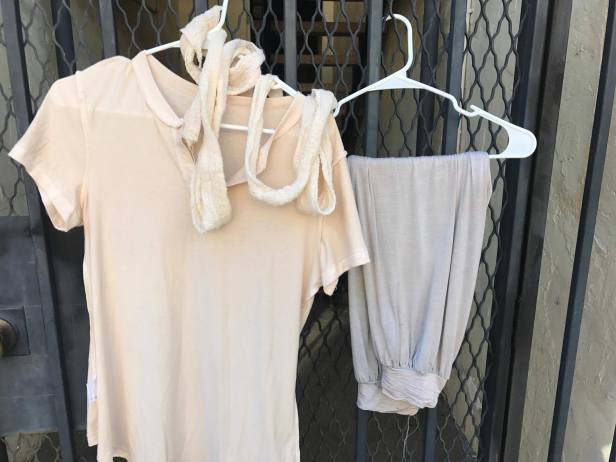
As you can see, the pants are a little light, but the shirt and bandages look great! With the shirt done, I just trimmed the bottom so it was even and cut most of the sleeves off the shirt. The bandages got tea dyed a little more so they’d look a little dirtier, but other than that I left them alone.
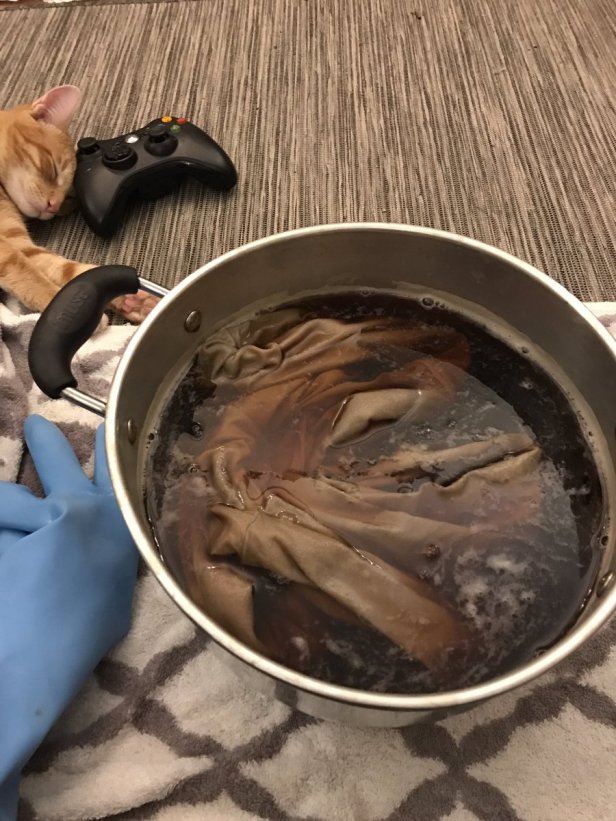
Now, onto Rey’s wrap dress. I purchased three yards of this fabric and cut the fabric in half and into two long strips. While those strips were separate, I dyed them both. This was made using a tea bath and about a teaspoons worth of Safari Grey and Ecru. I left them in for about ten to fifteen minutes, and then pulled them out. I also used a tea bath for my pants to add a little more color. Here’s a truly lovely photo of them simmering in a pot in my living room, featuring my cat Nugget, who wanted to help out a little.
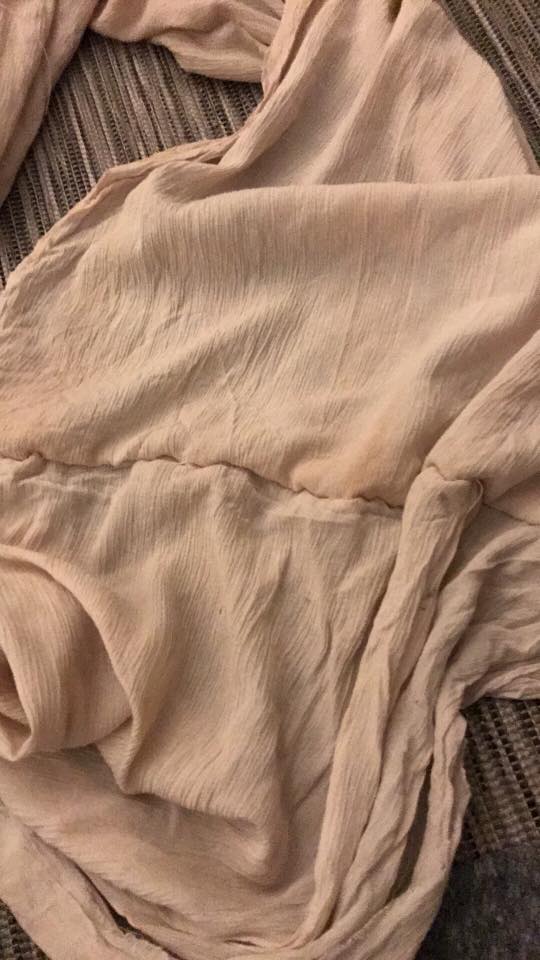
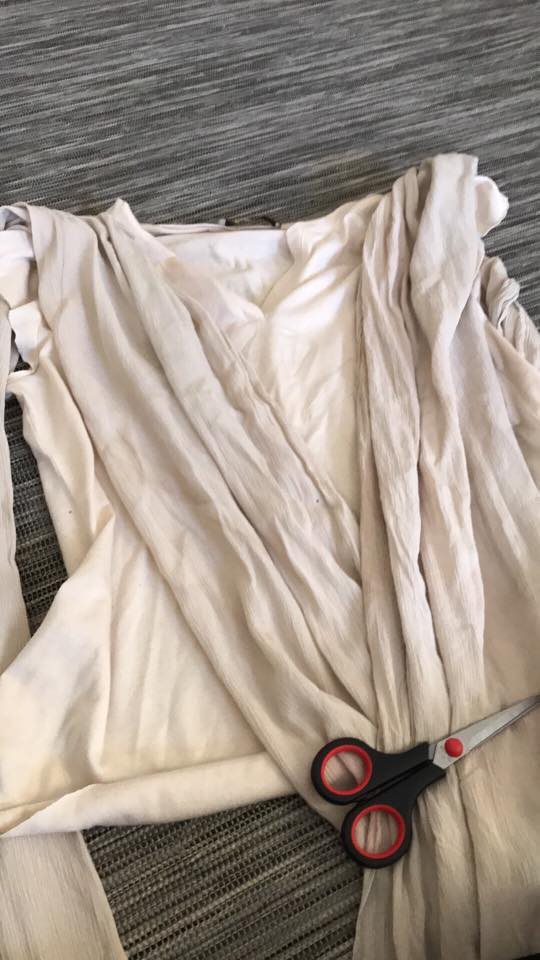
The wraps came out nearly perfect. Once they were done, I sewed the two pieces together, and then sewed them to the shoulders of my costume so they’d stay put. I put the seam connecting them at the bottom of the loop where it wraps around near my left leg. Here are a few photos of that process.
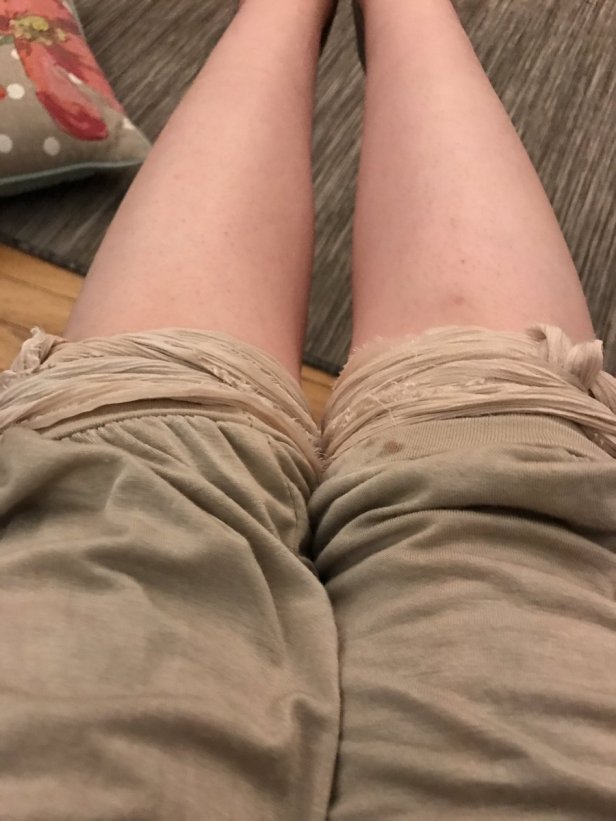
I took some scraps of my tabard fabric from where I trimmed it down to use as wraps around the base of Rey’s pants. Though they’re not really visible on screen, they’re still there and I wanted to go for Rebel Legion/screen accuracy, or at least as much as I could while being a novice cosplayer. Once those ties were sewed on, I dyed the pants one more time. It came out a little streaky, but the color was finally what I wanted it to be. It just shows that with a little patience, everything can turn out okay! Please enjoy this awkward photo of my legs and the ties.
The costume is still somewhat of a work in progress: I need to commission a side bag and fix my arm wraps so they stop falling down. I also need to trim my tabards so that they aren’t as wide. However, I’m proud of what I’ve accomplished so far, and wanted to share my journey so other newbie cosplayers could have a guide as well. Remember, the smile on a kid’s face when they see their favorite character at a con? That’s the real reason we do what we do. Always be kind to each other, and support each other’s work.
May the Force be with you. Always.